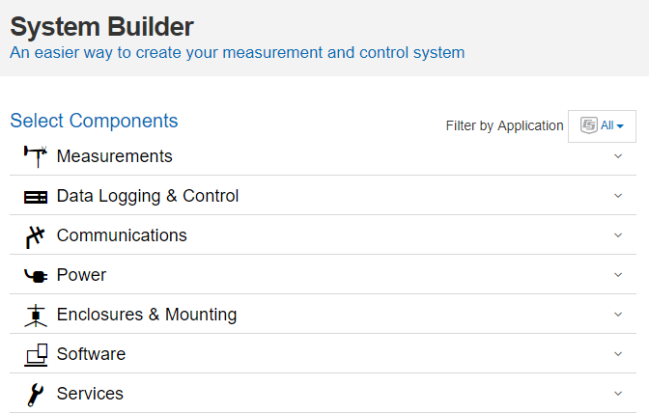
Getting the right system that will meet your measurement and monitoring needs is important to you. Helping you easily find the right solution is important to us. We are now offering a new tool you can use called System Builder. System Builder was designed for those customers who have the technical expertise or knowledge to design a complete system from nothing and who want to make the many decisions regarding component selection at every level. In this article, we’ll highlight how to navigate and use this new tool.
#1 - Location
To access and use System Builder, ensure you are logged in to our website and navigate to https://www.campbellsci.com/system-builder.
#2 - Filtered Views
You can use System Builder's filtered views to see the options most appropriate to your application.
- On the System Builder web page, navigate to the “Filter by Application” area and click the down arrow to see the listed applications:
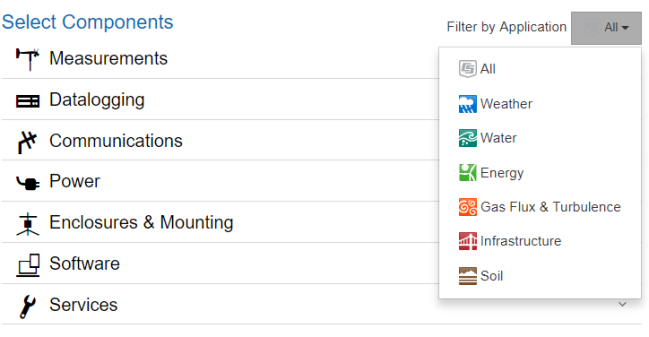
- Click one of the applications, and you will see it selected. For example:

#3 - Component Selection
- Navigate to the “Select Components” area. This area is a collapsed menu. Clicking a component section name or product category name expands the menu. Clicking a second time collapses the menu. For example, click Measurements and then click Air Temperature Sensors to see the list of products in that product category. You should see something like this:
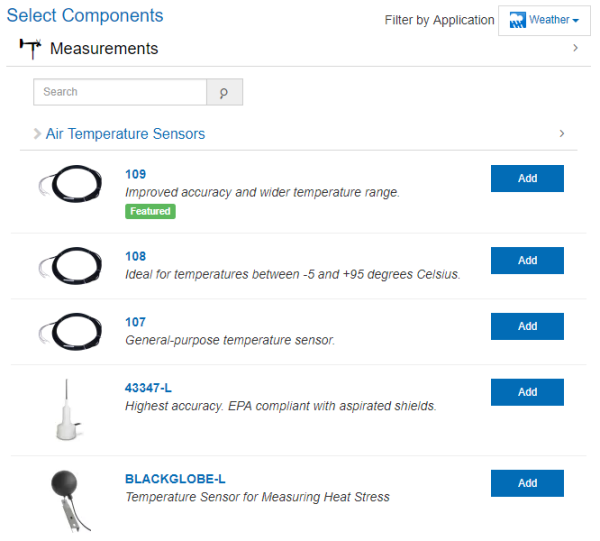
- Review the list of products in the product category you expanded. To select one of the products for your system, click Add. One of two actions will occur:
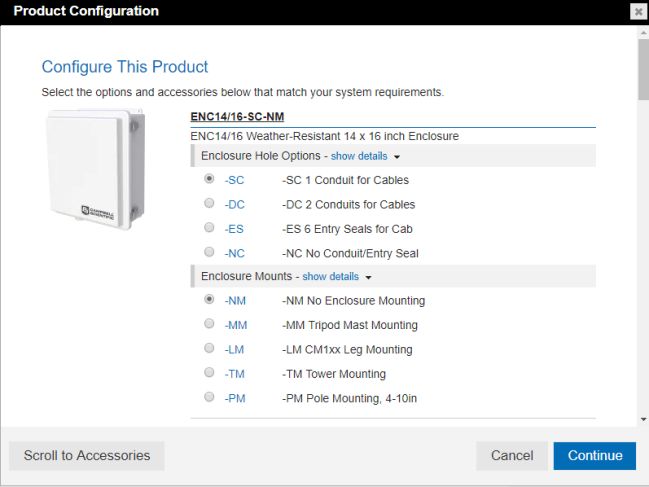
- If the selected product needs to be configured or if there are accessories you need to review—or both—a pop-up window opens. In this example, click the appropriate radio buttons to make your product configuration selections, navigate to the "Accessories" section to make your selections there, and then click Continue:
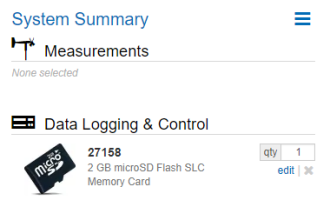
- For some products, there are no decisions you need to make, and the product is automatically added to the “System Summary” area. In this example, the Add button was clicked for the 27158 microSD card, and the product was added on the right-hand side under “Data Logging & Control”:
- If the selected product needs to be configured or if there are accessories you need to review—or both—a pop-up window opens. In this example, click the appropriate radio buttons to make your product configuration selections, navigate to the "Accessories" section to make your selections there, and then click Continue:
- As you review products that have accessories, you may discover that some accessories have accessories themselves. This information may be presented in one of two ways, and you can review and edit which accessories you want included:
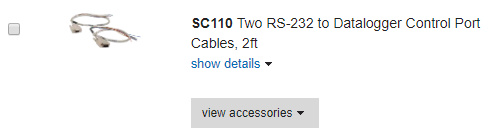
- If available, click view accessories:
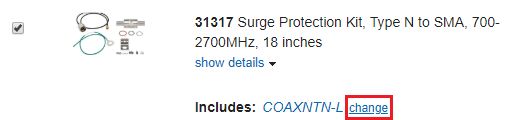
- If there is an “Includes” list, click change:
- If available, click view accessories:
- Click Continue when you are done making all your edits to a product and its accessories.
- When you are finished reviewing the products in a product category, collapse the product category by clicking on its name in the “Select Components” area.
- Move down the “Select Components” area, and continue the process of expanding component sections and product categories to review the products you want to add to your system. Select products and, as applicable, configure the products and their accessories.
#4 - Summary Review
In the “System Summary” area, there is a list of the products you selected for your system. Review the list to ensure you have the products you need. You can make changes at both the product level and the system level.
Product Level
At the product level (the CS320, for example), you can do several things:
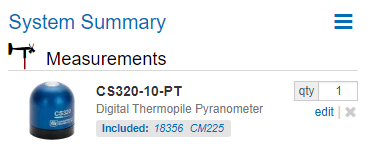
- Change the quantity in the box.
- Click edit to configure the product, edit the selected accessories, or both.
- Remove the product by clicking the x.
System Level
At the system level, you can do several things by clicking the hamburger icon (three stacked bars) and opening the drop-down menu:
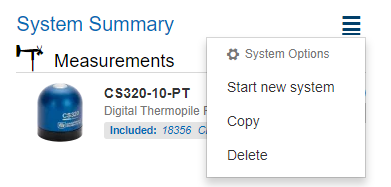
- Clicking Start new system saves your current system and enables you to begin designing another system.
Tip: Before clicking this option and saving your current system, navigate to the bottom of your list of products, and update the default name (“System 1”) of your system by typing in the desired name:

- If you click Copy from the drop-down menu, your current system is saved and a duplicate is created.
Tip: Before clicking this option and saving your current system, navigate to the bottom of your list of products, and update the default name (“System 1”) of your system by typing in the desired name:

After the copy of your system is created, you may choose to rename your system. - You can remove the current system by clicking Delete in the drop-down menu.
At the bottom of the product list for your system, there are options you can use. For example, in addition to renaming your system, you can click Load or start a new system:
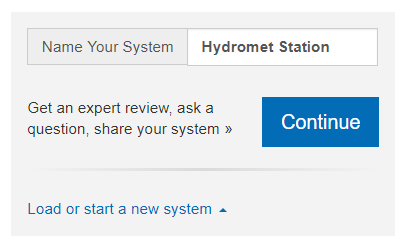
Clicking this link opens a drop-down menu:
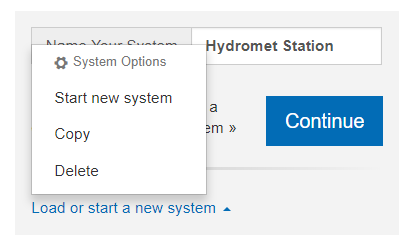
You’ll notice that this is the same list of options you see if you click the hamburger icon (three stacked bars) at the top by “System Summary.”
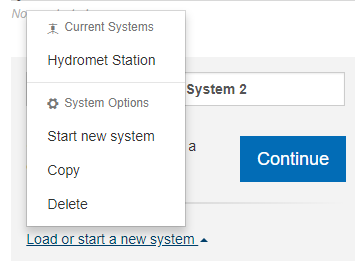
Note: If you start designing a new system, your first system—if you didn’t delete it—is displayed in the menu list. You can click your first system to select it and load it. In this example, “Hydromet Station” is the first saved system, and “System 2” is the current system:
#5 - Submission
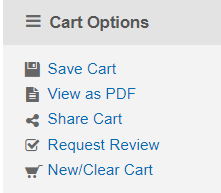
When you are ready to submit your system, click Continue below your list of products. You will be directed to the Shopping Cart page with all the standard “Cart Options” available to you when you order our products online:
In Summary
If you enjoy designing your own system from nothing and making the many component decisions necessary for a custom-built system, the System Builder tool is designed for you. We hope you find this new tool helpful.
If you have general questions or comments regarding using System Builder, please post them below.
Related Articles
Evolution Not Revolution: Updating an Established Product Range
Even successful products need to be objectively evaluated to determine if an improved design is justified. Get an insider look at our design planning process.
January 6, 2020
Evolution Not Revolution: Updating an Established Product Range
Even successful products need to be objectively evaluated to determine if an improved design is justified. Get an insider look at our design planning process.
January 6, 2020
L'évolution, pas la révolution : Mise à jour d'une gamme de produits établie
Même les produits réussis doivent être évalués objectivement pour déterminer si une conception améliorée est justifiée. Découvrez notre processus de planification du design.
January 6, 2020
Evolution Not Revolution: Updating an Established Product Range
Even successful products need to be objectively evaluated to determine if an improved design is justified. Get an insider look at our design planning process.
January 6, 2020